Recipe image
Recipe Finder blog

Homemade Chocolate Buttons: tempering tips and toppings

Prep 15 min Cook 10 min Difficulty 2/5

Step-by-step guide to making chocolate buttons with tempering tips, toppings, and quick tips for glossy, snap-worthy chocolates.

Why this recipe works

A practical guide to making chocolate pieces or buttons at home. This method works for dark chocolate lovers and anyone wanting glossy, snap-ready chocolates with optional toppings.

Search intent: how to temper chocolate and make chocolates at home
  • make chocolate buttons
  • tempered chocolate
  • how to temper chocolate at home
  • dark chocolate recipe
  • chocolate candy buttons
  • chocolate molds
  • seeding chocolate
  • patisserie chocolate tips

Key takeaways

Use a double boiler to melt without scorching
Seed with reserved chocolate for stable temper
Cool to working temperature before molding to avoid bloom

Recipe guide

A practical guide to making chocolate pieces or buttons at home. This method works for dark chocolate lovers and anyone wanting glossy, snap-ready chocolates with optional toppings.

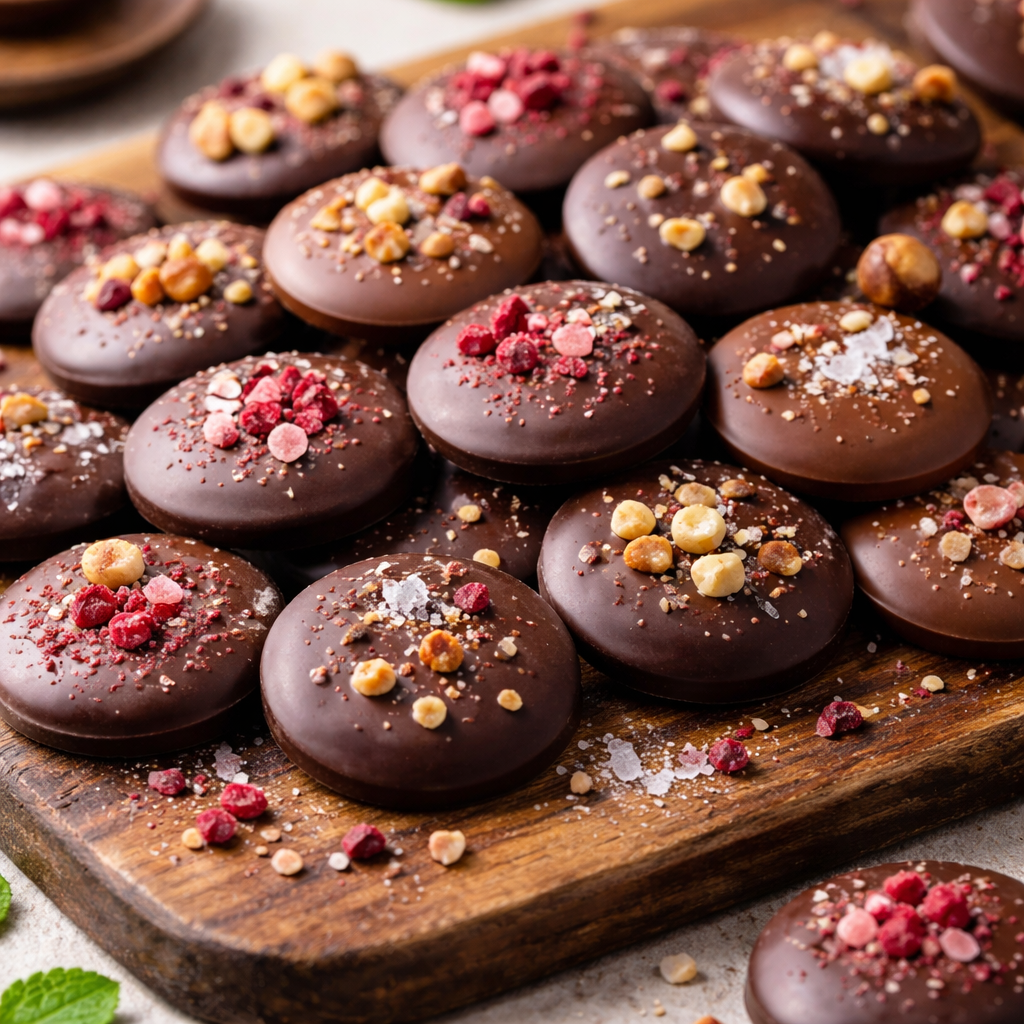
Create glossy, snap-ready chocolate buttons at home.

  • Use a double boiler to melt without scorching
  • Seed with reserved chocolate for stable temper
  • Cool to working temperature before molding to avoid bloom

Melt, seed, and temper

Melt and temper: Set up a double boiler and melt the chocolates together until mostly smooth. Off heat, seed with reserved chopped chocolate or cocoa butter and stir until glossy and at working temperature. Add vanilla and salt.

Fill molds and top

Mold and set: Pipe or spoon the tempered chocolate into silicone button molds. Tap to remove air bubbles and level the tops. Add optional toppings while wet.

Finish and store

Set and store: Let sit at room temp until firm, or chill 10–15 minutes. Unmold and store in an airtight container in a cool dry place away from odors.

Ingredients

  • 200 g dark chocolate (55–70% cocoa)
  • 100 g milk chocolate (optional, for blend)
  • 20 g cocoa butter (optional, for shine and easier tempering)
  • 1 tsp vanilla extract
  • 1 pinch fine sea salt
  • 1 tbsp chopped nuts (optional topping)
  • 1 tbsp freeze-dried raspberry bits (optional topping)
  • a few flakes sea salt (optional topping)

Instructions

  1. Chop the dark and milk chocolate into small, even pieces if using bars, or measure couverture or chocolate callets.
  2. Set up a heatproof bowl over a pan of simmering water (double boiler) making sure the bowl does not touch the water and stir chocolate until mostly melted.
  3. Remove bowl from heat and add the reserved chopped chocolate (seeding) or cocoa butter, stirring until fully smooth and glossy to bring the chocolate to temper (or continue stirring until cooled to working temperature).
  4. Stir in vanilla extract and a pinch of salt until evenly distributed.
  5. Place silicone button or small round molds on a tray. Spoon or pipe tempered chocolate into each cavity, tapping the tray gently to remove air bubbles and level the tops.
  6. Sprinkle optional toppings (sea salt, chopped nuts, or freeze-dried raspberry) onto the filled molds while chocolate is still wet.
  7. Let the molds sit at room temperature until set, or refrigerate for 10–15 minutes to speed setting.
  8. Invert molds onto a clean surface and pop out the chocolate pieces/buttons. Store in an airtight container in a cool, dry place away from strong odors.

FAQs

What is tempering and why is it important? Tempering stabilizes the cocoa butter crystals to give a shiny finish and good snap. Seed with some tempered chocolate or cocoa butter to seed the melt.
What temperature should I temper dark chocolate to? Temper at a working temperature appropriate for the chocolate blend (typically around 28–31°C for dark chocolate). Use a thermometer and avoid overheating.
Can I skip molds and just make chocolate shards? If you don’t have molds, you can spread thinly on a parchment-lined tray and break into pieces once set.